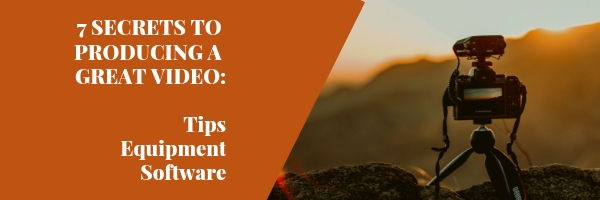
Oftentimes my friends and colleagues ask me what it takes to produce a great video. In my career I’ve done video vlogging for the companies I’ve worked for, I helped executives produce videos that address the company, I shot promotional videos and trailers for my own books, the list goes on.
I’ll be honest – I am not a professional videographer by any stretch of imagination. But that’s exactly, it seems, why my friends ask me – they want advice from someone who is not wrapped up in making a fancy professional video with super expensive equipment, they want advice from someone who is creating great videos with minimal effort and doing so on a reasonable budget.
Below are the things I suggest you pay attention to.
MESSAGE
Focus on your message. Map out what exactly you want to communicate. Write down the list, then pair it down. And then pair it down again. Leave the essentials only.
I suggest against memorizing anything, it will look forced. Rather, practice a couple of times so that you could hear it out loud. That usually changes your mind about the flow of delivery or the way you communicate certain parts of the message.
Another tip: don’t use complex words to try to sound fancy or use words you wouldn’t use in a regular conversation. It’ll trip you up every time.
DELIVERY
Do NOT try to make it perfect. You are human, if you trip up on a word or must rephrase something, it’s okay to not edit it out. No one expects you to be perfect, being human is just fine.
Sometimes it’s hard to talk to the camera because, let’s face it, it’s a bit unnatural. We are used to having a human person on the other side of the conversation. What I do when I experience that feeling is pretend that I am talking to one of my favorite industry colleagues and my stiffness goes away.
Contrary to what others will tell you, there is nothing wrong with being animated. People don’t like too polished, too stiff, too professional. I am, for example, a naturally passionate person. I talk loudly, I use my hands a lot, and I am usually super passionate about the topics I share. And that’s okay.
The best advice I can give you is this: be yourself. Don’t try to make yourself into something you are not. People will pick up on your personality quarks and that’s why they will keep coming back to watch your videos. Of course, there would be some who wouldn’t fully appreciate your uniqueness, and that’s okay. You don’t want a fan base who doesn’t “get you” or appreciate you.
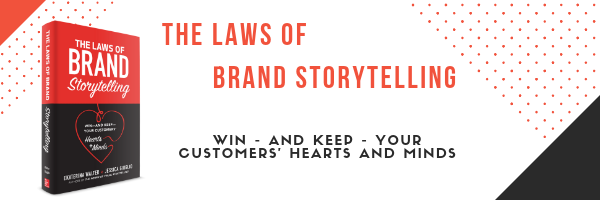
Example: the unboxing video I shot for my new book The Laws of Brand Storytelling. Some might say it’s corny, some might say it’s a bit over the top. But when I get excited, I get excited. And all my friends and followers know that about me. It really fits with “who I am.” And I don’t ever apologize for it. Plus, watch it and tell me you are not excited alongside me when you are done watching it. 😊
That said, tailor your message to your audience. You would probably talk one way with your prospective employer and another way with your friend.
It is okay to do multiple takes. That practice will allow you to see how you behave within the set frame, how you might want to alter your environment, what you might want to do differently, etc. Watch every take, decide what you want to change, and shoot the final one.
One last piece of advice is: film standing up. It will improve your posture, give you more chance to move around a bit, project your voice and energy better, and will altogether make you look good. I am not a fan of sitting down while filming a video.
LENGTH
There are 2 things to remember:
- People’s attention span isn’t long. For a regular vlog or personal message, normally 1-3 min video is long enough. For a video resume, 5-7 minutes should work. You get the point.
- Maximum length allowed for posting on different social networks, if you are planning on posting natively (vs. linking to YouTube). On Twitter, for example, maximum length allowed is 2 minutes 20 seconds; on LinkedIn, it’s 10 minutes; etc.
Another tip: start with the key message. Don’t create a lengthy intro, otherwise, you’ll lose people’s attention right away.
LOOK
What you are wearing matters as well. There are some colors and patterns that are not great for a video. For example, consider this:
- Avoid wearing stripes, plaid, polka dots, or other patterns. Striped clothing may create a weird optical effect called a moire pattern, where different patterns might compete with each other.
- Don’t wear all black or all white. Throw in a bit of a contrast, the camera will boost it. In general, all white is not a great choice. And contrary to what you may think, black won’t make you look slimmer on camera, the lack of contrast will make it hard for the camera to pick up where your arms end and your torso begins, making you look wider.
- Try to wear clothing that compliments the background. If your environment / background clashes with the colors you are wearing, it’ll look strange.
- Avoid anything that references a specific time or place can make your video appear dated.
- Watch out for accessories that might reflect the light or make noise.
- Sometimes glasses can cause glares or reflections so it’s better to keep them off, if you can. I struggle with this all the time since I wear glassed myself.
- If you are filming in front of a green screen, do not wear green.
- If you use makeup, foundation is always a great idea. It smooths out your skin and, coupled with the studio light, your skin will look flawless. And powder will give you an even, matte finish and cut down on distracting forehead and cheek shine.
- If you are not using makeup, then at a minimum consider using oil-absorbing sheets, they will reduce the oil sheen that the camera will intensify (I always carry those with me).
QUALITY
One of my professional videographer friends gave me this advice once: “It’s okay if the video quality isn’t the best, as long as the audio quality is great, people will watch it.”
I never used any professional cameras. All my videos are shot on my iPhone. The camera quality is good enough and, if you add a lav mic, the audio will be solid as well. If I am shooting at home and it’s quiet, most of the time I don’t use the mic either. More on the equipment below.
EDITING
Several secrets I learned:
- If you are placing the video on social media, always add captions on the bottom. It’ll get way more views because people are watching those videos on silent.
- Add a black bar on top that tells people what they should expect from your video (see my unboxing video). It doesn’t always fit with the purpose of your video, so be select where to use it. Several of my friends did the test where they posted the video with and without the black bar and they consistently got more views with the video that had the black bar on it.
- Add a call-to-action: link to the website, link to buy your book, where to learn more. Use a jump link that’s easy to remember (e.g. bit.ly link).
Let’s talk software. I never recommend something I’ve never used. So here’s my favorite video editing software: Camtasia by TechSmith. I am a HUGE fan of TechSmith software. I’ve used their software for over 10 years and every year I fall a little bit more in love with it. I also use SnagIt by TechSmith for good-looking screenshots, training videos, and screen capture in general.
Both are extremely easy to learn and very versatile. And when I say easy to learn, I mean it. I pick up things fast but when it comes to software, I want it kindergarten-level easy. Moreover, TechSmith has a ton of free training videos that will get you editing your own videos in under 20 minutes.
In addition, Camtasia has a ton of great transitions, call-outs, music, and other nifty things built in to help you create professional-looking videos.
For certain scenarios (e.g. when you want to do a compilation of photos and video snippets and create one good-looking summary/wrap-up video) I also like to use Spark Video mobile app from Adobe. It’s free, but if you want to remove Adobe Spark branding from the end of the video, you can pay $9.99/month to create a fully custom, fully branded videos.
EQUIPMENT
And, of course, you need equipment to help you create videos of decent quality. Below are my suggestions (these are the tools I use myself).
Creating a makeshift studio:
I am not a fan of a green screen. I love a more natural environment. In my house, I use a favorite corner of my library as a backdrop to shoot my videos. All my equipment is set up there. I don’t have a ton of equipment (just necessities), so they are easy to move when I need to.
Here is what I use:
- Studio light
- Tripod
- Phone tripod mount
- Small magnetic tripod with remote shutter control
- Lav mic + extension cable
You can absolutely set up a small studio with the green screen in your house. Here is a post from TechSmith that walks you through everything you need to know.
Some of my friends even went one step further and painted a wall with the green screen color instead of buying a screen. Here is one example of the paint that would work. But you can google Rosco Chroma Key Paint and find lots of options that can be delivered straight to your home.
On the go:
When I shoot at events, here is what I bring with me in addition to some of the items I already listed above:
- Smartphone stabilizer: Smove
- Power bank
- Wide lens with LED light
- Lav mics (2 pack) for when you need to interview multiple people
There you have it. I hope this post was helpful.
My last piece of advice is this – don’t overthink it. Just start doing it. Don’t go for perfect. Don’t stress out. Just start shooting short videos and you will get better and better every time.
P.S. If you have favorite equipment or software that you love and want to share with others, please leave a comment and share them with us.
Cover image credit: Luis Quintero @jibarofoto